نوار پیشرفت (Progress Bar) در بوت استرپ

نوار پیشرفت یا progress bar در بوت استرپ چیست؟
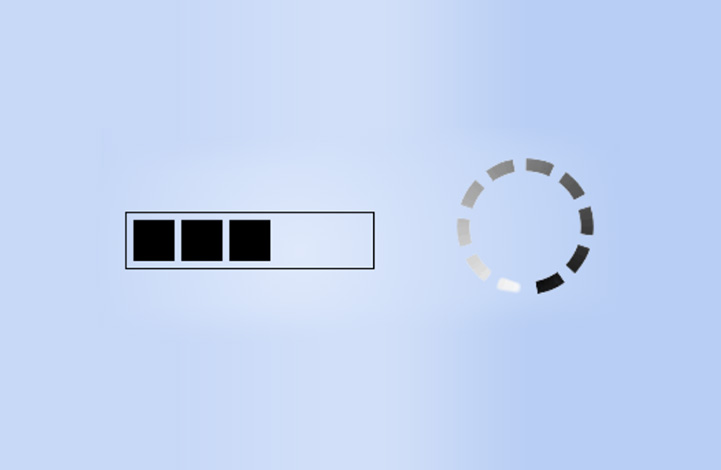
نوار پیشرفت یا progress bar در بوت استرپ، همانطور که از نامش پیدا است نواری است که وضعیت کاربر در یک پروسه را مشخص می کند. به عبارت دیگر به کاربر نشان می دهد چقدر در فلان عملیات پیشرفت کرده است. برای ساخت این نوع از عناصر باید به عنصر نگه دارنده، کلاس progress. و به عنصر فرزند نیز کلاس progress-bar. را بدهید. بقیه ی جزئیات با قوانین CSS (مانند width برای تعیین عرض نوار پیشرفت) قابل تنظیم هستند.
به مثال زیر توجه کنید:
<!DOCTYPE html>
<html lang="en">
<head>
  <title>Bootstrap Example</title>
  <meta charset="utf-8">
  <meta name="viewport" content="width=device-width, initial-scale=1">
  <link rel="stylesheet" href="https://maxcdn.bootstrapcdn.com/bootstrap/4.3.1/css/bootstrap.min.css">
  <script src="https://ajax.googleapis.com/ajax/libs/jquery/3.4.0/jquery.min.js"></script>
  <script src="https://cdnjs.cloudflare.com/ajax/libs/popper.js/1.14.7/umd/popper.min.js"></script>
  <script src="https://maxcdn.bootstrapcdn.com/bootstrap/4.3.1/js/bootstrap.min.js"></script>
</head>
<body>

<div class="container">
  <h2>Basic Progress Bar</h2>
  <p>To create a default progress bar, add a .progress class to a container element and add the progress-bar class to its child element. Use the CSS width property to set the width of the progress bar:</p>
  <div class="progress">
    <div class="progress-bar" style="width:70%"></div>
  </div>
</div>

</body>
</html>
تعیین ارتفاع
ارتفاع نوار پیشرفت به طور پیش فرض 16 پیکسل است ولی می توانیم با استفاده از قابلیت height در زبان CSS آن را تغییر دهیم. البته نکته ای که باید حتما به آن توجه کنید این است که حتما ارتفاع نگه دارنده (عنصر پدر) و خود نوار پیشرفت یکی باشند. به مثال زیر توجه کنید:
<!DOCTYPE html>
<html lang="en">
<head>
  <title>Bootstrap Example</title>
  <meta charset="utf-8">
  <meta name="viewport" content="width=device-width, initial-scale=1">
  <link rel="stylesheet" href="https://maxcdn.bootstrapcdn.com/bootstrap/4.3.1/css/bootstrap.min.css">
  <script src="https://ajax.googleapis.com/ajax/libs/jquery/3.4.0/jquery.min.js"></script>
  <script src="https://cdnjs.cloudflare.com/ajax/libs/popper.js/1.14.7/umd/popper.min.js"></script>
  <script src="https://maxcdn.bootstrapcdn.com/bootstrap/4.3.1/js/bootstrap.min.js"></script>
</head>
<body>

<div class="container">
  <h2>Progress Bar Height</h2>
  <p>The height of the progress bar is 1rem (16px) by default. Use the CSS height property to change the height:</p>
  <div class="progress" style="height:10px">
    <div class="progress-bar" style="width:40%;height:10px"></div>
  </div>
  <br>
  <div class="progress" style="height:20px">
    <div class="progress-bar" style="width:50%;height:20px"></div>
  </div>
  <br>
  <div class="progress" style="height:30px">
    <div class="progress-bar" style="width:60%;height:30px"></div>
  </div>
</div>

</body>
</html>
اضافه کردن متن به نوار پیشرفت
برای اضافه کردن متن به نوار های پیشرفت کافی است به خود عنصر متنی را اضافه کنید. مثال:
<!DOCTYPE html>
<html lang="en">
<head>
  <title>Bootstrap Example</title>
  <meta charset="utf-8">
  <meta name="viewport" content="width=device-width, initial-scale=1">
  <link rel="stylesheet" href="https://maxcdn.bootstrapcdn.com/bootstrap/4.3.1/css/bootstrap.min.css">
  <script src="https://ajax.googleapis.com/ajax/libs/jquery/3.4.0/jquery.min.js"></script>
  <script src="https://cdnjs.cloudflare.com/ajax/libs/popper.js/1.14.7/umd/popper.min.js"></script>
  <script src="https://maxcdn.bootstrapcdn.com/bootstrap/4.3.1/js/bootstrap.min.js"></script>
</head>
<body>

<div class="container">
  <h2>Progress Bar With Label</h2>
  <div class="progress">
    <div class="progress-bar" style="width:70%">70%</div>
  </div>
</div>

</body>
</html>
ما در این مثال متن %70 را به متن اضافه کرده ایم.
نوارهای پیشرفت رنگی
همانطور که در مثال های قبلی دیده اید، رنگ پیش فرض برای نوارهای پیشرفت آبی است اما اگر از رنگ های بوت استرپ استفاده کنید، به راحتی تغییر می کنند:
<!DOCTYPE html>
<html lang="en">
<head>
  <title>Bootstrap Example</title>
  <meta charset="utf-8">
  <meta name="viewport" content="width=device-width, initial-scale=1">
  <link rel="stylesheet" href="https://maxcdn.bootstrapcdn.com/bootstrap/4.3.1/css/bootstrap.min.css">
  <script src="https://ajax.googleapis.com/ajax/libs/jquery/3.4.0/jquery.min.js"></script>
  <script src="https://cdnjs.cloudflare.com/ajax/libs/popper.js/1.14.7/umd/popper.min.js"></script>
  <script src="https://maxcdn.bootstrapcdn.com/bootstrap/4.3.1/js/bootstrap.min.js"></script>
</head>
<body>

<div class="container">
  <h2>Colored Progress Bars</h2>
  <p>Use any of the contextual color classes to change the color of the progress bar:</p>
  <!-- Blue -->
  <div class="progress">
    <div class="progress-bar" style="width:10%"></div>
  </div><br>

  <!-- Green -->
  <div class="progress">
    <div class="progress-bar bg-success" style="width:20%"></div>
  </div><br>

  <!-- Turquoise -->
  <div class="progress">
    <div class="progress-bar bg-info" style="width:30%"></div>
  </div><br>

  <!-- Orange -->
  <div class="progress">
     <div class="progress-bar bg-warning" style="width:40%"></div>
  </div><br>

  <!-- Red -->
  <div class="progress">
    <div class="progress-bar bg-danger" style="width:50%"></div>
  </div><br>

  <!-- White -->
  <div class="progress border">
    <div class="progress-bar bg-white" style="width:60%"></div>
  </div><br>

  <!-- Grey -->
  <div class="progress">
    <div class="progress-bar bg-secondary" style="width:70%"></div>
  </div><br>

  <!-- Light Grey -->
  <div class="progress border">
    <div class="progress-bar bg-light" style="width:80%"></div>
  </div><br>

  <!-- Dark Grey -->
  <div class="progress">
    <div class="progress-bar bg-dark" style="width:90%"></div>
  </div>
</div>

</body>
</html>
راه راه کردن نوار پیشرفت
حتما دیده اید که در برخی از موارد، نوارهای پیشرفت در سایت های مختلف راه راه هستند یا طرح خاصی درونشان قرار گرفته است. شما با اضافه کردن کلاس progress-bar-striped. به عنصر مورد نظر می توانید این طرح های راه راه را به نوار خود اضافه کنید. به مثال زیر دقت کنید:
<!DOCTYPE html>
<html lang="en">
<head>
  <title>Bootstrap Example</title>
  <meta charset="utf-8">
  <meta name="viewport" content="width=device-width, initial-scale=1">
  <link rel="stylesheet" href="https://maxcdn.bootstrapcdn.com/bootstrap/4.3.1/css/bootstrap.min.css">
  <script src="https://ajax.googleapis.com/ajax/libs/jquery/3.4.0/jquery.min.js"></script>
  <script src="https://cdnjs.cloudflare.com/ajax/libs/popper.js/1.14.7/umd/popper.min.js"></script>
  <script src="https://maxcdn.bootstrapcdn.com/bootstrap/4.3.1/js/bootstrap.min.js"></script>
</head>
<body>

<div class="container">
  <h2>Striped Progress Bars</h2>
  <p>The .progress-bar-striped class adds stripes to the progress bars:</p>
  <div class="progress">
    <div class="progress-bar progress-bar-striped" style="width:30%"></div>
  </div>
  <br>
  <div class="progress">
    <div class="progress-bar bg-success progress-bar-striped" style="width:40%"></div>
  </div>
  <br>
  <div class="progress">
    <div class="progress-bar bg-info progress-bar-striped" style="width:50%"></div>
  </div>
  <br>
  <div class="progress">
    <div class="progress-bar bg-warning progress-bar-striped" style="width:60%"></div>
  </div>
  <br>
  <div class="progress">
    <div class="progress-bar bg-danger progress-bar-striped" style="width:70%"></div>
  </div>
</div>

</body>
</html>
اما این طرح هنوز هم به اندازه ی کافی جالب نیست و می توانیم به آن انیمیشن اضافه کنیم!
برای ایجاد انیمیشن در نوارهای وضعیت، از کلاس progress-bar-animated. استفاده کنید. با اضافه کردن انیمیشن به این نوارها حس بارگذاری واقعی در کاربر تداعی می شود:
<!DOCTYPE html>
<html lang="en">
<head>
  <title>Bootstrap Example</title>
  <meta charset="utf-8">
  <meta name="viewport" content="width=device-width, initial-scale=1">
  <link rel="stylesheet" href="https://maxcdn.bootstrapcdn.com/bootstrap/4.3.1/css/bootstrap.min.css">
  <script src="https://ajax.googleapis.com/ajax/libs/jquery/3.4.0/jquery.min.js"></script>
  <script src="https://cdnjs.cloudflare.com/ajax/libs/popper.js/1.14.7/umd/popper.min.js"></script>
  <script src="https://maxcdn.bootstrapcdn.com/bootstrap/4.3.1/js/bootstrap.min.js"></script>
</head>
<body>

<div class="container">
  <h2>Animated Progress Bar</h2>
  <p>Add the .progress-bar-animated class to animate the progress bar:</p>
  <div class="progress">
    <div class="progress-bar progress-bar-striped progress-bar-animated" style="width:40%"></div>
  </div>
</div>

</body>
</html>
چند قسمتی کردن نوارهای پیشرفت
یکی از موارد کاربردی و بسیار جالب نوارهای پیشرفت، امکان تقسیم کردن نوار به قسمت های مختلف است.
به طور مثال در کد زیر گفته ایم که نوار به قسمت های عادی، هشدار، خطر و ... تقسیم شود تا زمانی که مقدار چیزی به حد خطرناک رسید، کاربر از آن مطلع شود:
<!DOCTYPE html>
<html lang="en">
<head>
  <title>Bootstrap Example</title>
  <meta charset="utf-8">
  <meta name="viewport" content="width=device-width, initial-scale=1">
  <link rel="stylesheet" href="https://maxcdn.bootstrapcdn.com/bootstrap/4.3.1/css/bootstrap.min.css">
  <script src="https://ajax.googleapis.com/ajax/libs/jquery/3.4.0/jquery.min.js"></script>
  <script src="https://cdnjs.cloudflare.com/ajax/libs/popper.js/1.14.7/umd/popper.min.js"></script>
  <script src="https://maxcdn.bootstrapcdn.com/bootstrap/4.3.1/js/bootstrap.min.js"></script>
</head>
<body>

<div class="container">
  <h2>Multiple Progress Bars</h2>
  <p>Create a stacked progress bar by placing multiple bars into the same div with class="progress":</p>
  <div class="progress">
    <div class="progress-bar bg-success" style="width:40%">
      Free Space
    </div>
    <div class="progress-bar bg-warning" style="width:10%">
      Warning
    </div>
    <div class="progress-bar bg-danger" style="width:20%">
      Danger
    </div>
  </div>
</div>

</body>
</html>
امیدوارم از درس آموزش ایجاد انواع progress bar در بوت استرپ از مجموعه آموزش Bootstrap 4 لذت برده باشید.





در این قسمت، به پرسشهای تخصصی شما دربارهی محتوای مقاله پاسخ داده نمیشود. سوالات خود را اینجا بپرسید.
در این قسمت، به پرسشهای تخصصی شما دربارهی محتوای مقاله پاسخ داده نمیشود. سوالات خود را اینجا بپرسید.
در این قسمت، به پرسشهای تخصصی شما دربارهی محتوای مقاله پاسخ داده نمیشود. سوالات خود را اینجا بپرسید.
در این قسمت، به پرسشهای تخصصی شما دربارهی محتوای مقاله پاسخ داده نمیشود. سوالات خود را اینجا بپرسید.